• Skip to primary navigation
  • Skip to main content
  • Skip to primary sidebar
  • Skip to footer

Custom Buttons and Stickers by Just Buttons

Buttons and Stickers

  • Home
  • Order Custom Buttons
    • Round Buttons
      • 1″ Buttons
      • 1.25″ Buttons
      • 1.5″ Buttons
      • 1.75″ Buttons
      • 2.25″ Buttons
      • 2.50 Buttons
      • 3″ Buttons
      • 3.5″ Buttons
      • 4″ Buttons
      • 6″ Buttons
    • Rectangle Buttons
      • 1.75″ x 2.75″
      • 2″ x 3″
      • 2.5″ x 3.5″
      • 2.75″ x 1.75″
      • 3″ x 2″
      • 3.5″ x 2.5″
    • Shaped Buttons
      • Square Buttons
      • Rounded Square Buttons
      • Rounded Rectangle
      • Oval Buttons
  • Order Custom Stickers
    • Die Cut Stickers
    • Round Stickers
    • Rectangle Stickers
    • Square Stickers
    • Oval Stickers
  • Gallery
  • Contact Us
  • Custom Stickers
  • Blog
    • Custom Buttons
    • Custom Stickers
    • Button News
    • Design Help

How to Make a Button

February 6, 2017 By Karlie

How to Make a Button

It seems that everyone loves buttons.  People collect and trade them, but have you ever wondered how to make one?  At Just Buttons, we’ve been making buttons for a long time, and we have a few tips for those of you out there who want to learn how to make your own buttons.  You can either invest in machines and supplies or you can order buttons from a button maker like Just Buttons.

Before you make buttons….

  1. Pick a Size:
    Button making is fun, but it can get expensive pretty quickly. The first decision to make is about size. The smaller the size, the cheaper it is to get started. Smaller buttons require smaller machines and parts.  Don’t forget to buy a cutter as well.  Circle cutters bought at your craft store might work, but the cutters sold by the manufacturers will always work. Which will save you space and money. It costs a heck of a lot more to ship 3.5″ buttons than it does to ship 1″.   At Just Buttons, we offer seven shapes and twenty-one sizes.
  2. Research Suppliers
    If you do a quick search on eBay you will find a variety of inexpensive button machines.  Most are imported from China. Stay away from these machines. You are going to want to buy a machine made in the USA. Machines made in the USA will use standard parts, which are made in the USA. If you buy one of the Chinese machines you will have to import your parts at a premium.  There are several USA suppliers that all produce good button makers,  Tecre, USA Buttons, and Badge Parts.  Avoid machines that claim to be able to do multiple sizes. They are nothing but trouble.
  3. Research Printers
    How will you print the graphics for your buttons?  If you have a printer, what is it going to cost per page to print?  Laser, inkjet?  Will you be having the prints done professionally? At Just Buttons, we use a professional digital printing press.
  4. Research Software
    What programs will you use to set up the art for your custom made buttons?  Corel, Photoshop, Illustrator?  Or will you try to use Microsoft Word (which we do not recommend!) You are going to need a program capable of handling and printing high quality, vector artwork. You will also need a computer equipped with enough memory and processing power to handle graphic work.  In our shop, we are running Macs with the latest Adobe Creative Cloud Suite.
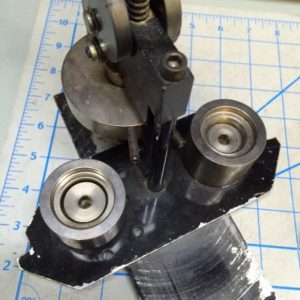
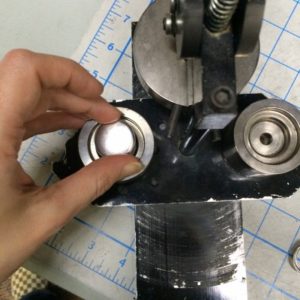
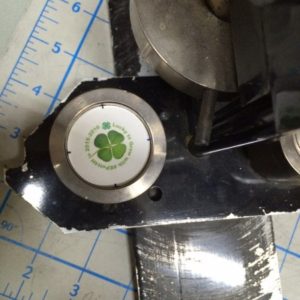
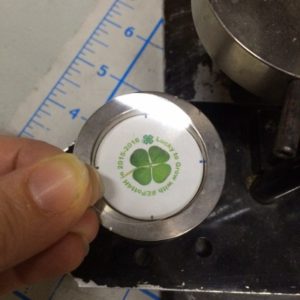
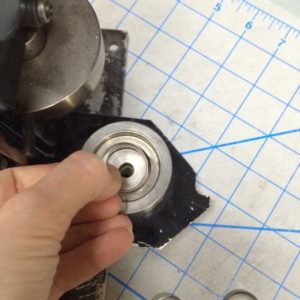
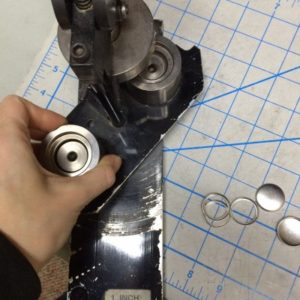
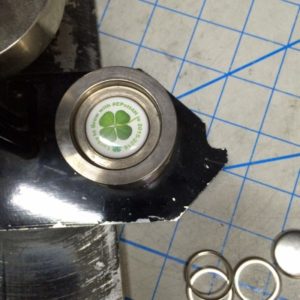
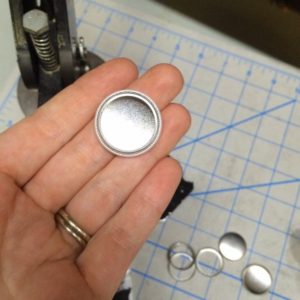
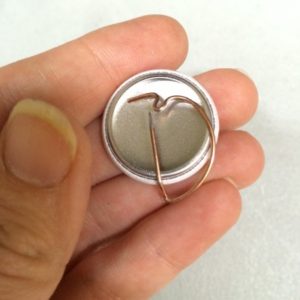
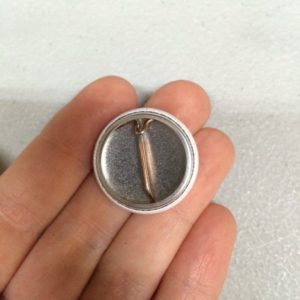
Making Buttons

For this tutorial, we are using a Tecre 1″ round hand press.

1 inch button press
Inspect your press. Ensure that all the bolts (even the bottom one) is nice and tight. If the bottom bolt is loose your buttons will fall apart. Make sure the dies are clear of debris, and lubricate the die if necessary with a silicone based lubricant. Make sure that the die swings freely.
1 inch button press shell
Place the shell into the pick up die with the sharp edge of the shell facing down. It should fit easily into the die.
button press image
Place your graphic on top of the shell you just placed in the pick up die. If the graphic is cut correctly it will rest comfortably on the shell. Be sure to line up your graphic so that it sits correctly on the button.
button press mylar
Make sure both your graphic and mylar are free of debris. Place the clear protective mylar on top of the graphic.
button press collet
Place the collet in the open die. Make sure you place it in sharp side up. Collets tend to come from the manufacturer nested. Make sure you only put one collet in the die. If you try to press more than one, you will jam the machine.
Rotate the die so that the crimp die that has your shell, graphic, and mylar are under the top die. Pull the handle down as far as it will go, then raise it back up. Spin the die so that the collet die is under the top die. Pull the handle down as far as it will go, then raise it back up.
one inch button
Spin the die to reveal your button.
one inch button
One inch rounds are unique in that they are the only common button that requires a pin to be manually installed. All sizes larger than 1″ have a safety pin integrated into their back.
spring lock backs
Spring lock backs come tangled together. Shake them out over your work space before attempting to pin. Slide the top part of the pin under the collet and press down. It takes a little practice, and your thumbs will be sore after the first few hundred you do. Don’t be alarmed when your fingers turn black. It’s just the metal oxidizing, and it washes off easily.
pinback button
Be sure to lock the pin in place. Then pat yourself on the back. You’ve made a button!

Filed Under: Custom Button & Sticker Design Help Tagged With: Button making, button making tutorial, button press, custom buttons, DIY, how to make a button, tutorial

Primary Sidebar

Quick OrderFree QuoteTemplatesHelp
CUSTOM BUTTONS & STICKERS USA MADE

Buttons News

Akron Unveils First Night Buttons

10:09 pm 16 Nov 2017

White Button Campaign to Raise Awareness of Sexual Assault

10:05 pm 16 Nov 2017

Let’s get Fed! World Food Prize

4:57 pm 28 Sep 2017
Load More...
Follow on Instagram

Footer

Recent Posts

  • Grooving to the Stars: it’s Astral Boutique!
  • A Conspiracy of Puppets!
  • Akron Unveils First Night Buttons
  • White Button Campaign to Raise Awareness of Sexual Assault
  • Let’s get Fed! World Food Prize

Blog

  • Button News
  • Custom Button & Sticker Design Help
  • Custom Buttons
  • Custom Stickers
  • Customer Spotlight
  • Featured Post
  • Uncategorized

Order Custom Stickers

ORDER CUSTOM BUTTONS

Copyright © 2025 · Just Buttons LLC · Branford, CT I 1-800-564-2924 · Log in